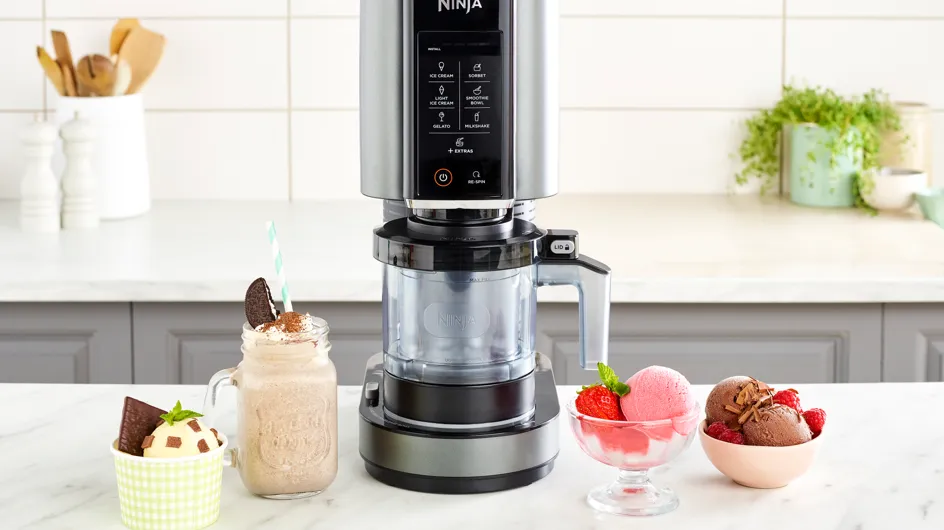
When I first unpacked my Ninja Swirl, I looked at all the parts, programs and buttons, and thought «okay, where do I start? The manual supplied is 50 pages long, in English, with diagrams that aren't always clear. I made a lot of beginner's mistakes before really understanding how this machine works.
Three months later, after over 70 different ice creams, I've finally mastered Ninja Swirl. And I can tell you that once you understand the logic, it's really simple. But there are a few subtleties you need to know to succeed every time.
Things to remember : The Ninja Swirl works in 4 steps: prepare your liquid base, freeze for at least 24 hours, blend with the right program, dispense or serve. The secret to success is to choose the right program for the type of ice cream you want, and to respect the Max Fill line. Once you've made your first successful ice cream, everything becomes intuitive.
How Ninja Swirl works
Before getting into the practical details, it's important to understand how this machine works. Unlike a conventional ice cream maker that turbines during freezing, the Ninja Swirl uses a completely different technology called Creamify.
The process is simple: first you freeze your preparation completely solid for at least 24 hours. The machine then uses a high-power blade (the Creamerizer) which grates, kneads and incorporates air into this frozen block to transform it into creamy ice cream. Everything happens in 2 to 6 minutes depending on the program chosen.
This approach fundamentally changes the texture obtained compared with an ice-cream maker. You can transform practically any liquid in ice cream, even unbalanced preparations that would never work in a conventional turbine.
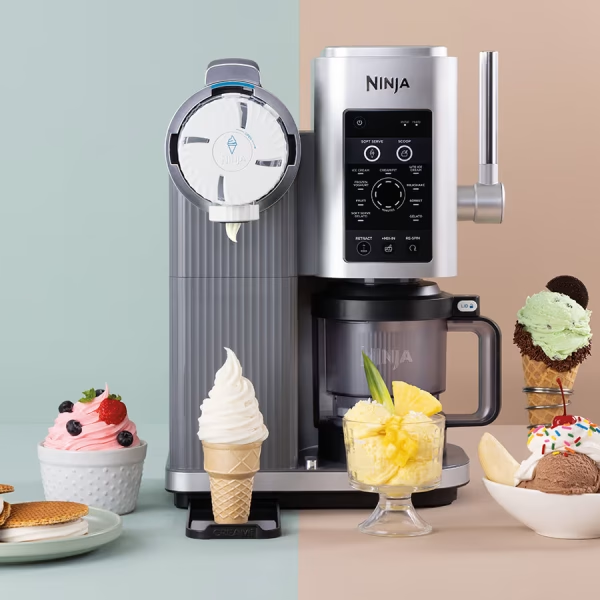
The great novelty of the Swirl, compared to other Creami models, is the soft serve distribution system. Some programs create a lighter, airier texture that can be dispensed directly into a cone, as in an ice cream parlour.
The 4 steps to making ice cream with the Ninja Swirl
Here's the whole process from start to finish. I detail each step along with my tips for avoiding the pitfalls.
Step 1: Prepare your base (5 minutes)
The first step is to prepare your liquid mix. It can be as simple as a ready-made protein shake, or as elaborate as a homemade custard with egg yolks.
All your ingredients must be well mixed until the sugar and other powders are completely dissolved. I insist on this point: if your sugar isn't dissolved, you'll have crystals in your final icing. I always whisk for at least 2 minutes to be sure.
For the quantity, fill the pot to the brim. Max Fill line clearly marked on the inside. Do not exceed never this line, If you don't, it'll overflow during mixing. I learned this the hard way with my second ice cream, which resulted in a complete clean-up of the machine.
However, you can put less than the Max Fill line if you like. The minimum viable is about 300-350mlfor the paddle to work properly. Underneath, there is not enough material to mix.
Once your base is ready in the pot, you screw the storage cover (not the nozzle at the moment, just the single lid). Make sure it's tightly closed.
Step 2: Freeze for at least 24 hours (patience)
This is the most frustrating for beginners: waiting. Your preparation must be completely frozen solidbefore it can be mixed. The absolute minimum is 24 heures, but I recommend 36 hours to be really sure, especially if your freezer isn't super powerful.
How do I know it's ready? The jar must be hard as concrete. If you shake it, nothing should move inside. If it still moves a little, it's not frozen enough. I once made the mistake of blending after only 20 hours: the result was grainy and disappointing.
A little tip: place your pots stand in the freezer, not lying down. This prevents warping and potential leaks if the lid isn't perfectly closed.
You can prepare several pots in advance and keep them in the freezer for 2-3 weeks no problem. It's even advisable to always have stock ready to mix. I usually prepare 4-5 pots on Sundays for the week.
Step 3: Assemble and blend (3-6 minutes)
The next day (or several days later), it's time to turn your frozen block into ice cream. Take the jar out of the freezer and remove the storage lid.
For a scoopable ice (normal), you place the pot directly into the outer bowl of the Swirl. Make sure it's centered on the bottom. Install the bowl cover with the Creamerizer blade already in place. Lock the lid by turning it until it clicks into place.
For soft serve distribuable, before placing the pot in the bowl, you must screw the delivery nozzle to the base of the pot. Turn firmly until tight. Only then do you place the jar with nozzle in the outer bowl.
Place the complete bowl on the machine base. The display lights up automatically. Select your program by pressing the navigation buttons. When the correct program is displayed, press Start.
The machine will start up with a fairly intense noise (normal, it's powerful). A timer appears on the displayindicating remaining time. Don't touch anything during the cycle - the machine does everything by itself. Time varies according to program:
- Ice Cream, Gelato: 2-3 minutes
- Sorbet: 2 minutes
- Soft Serve: 3-4 minutes
- Milkshake: 2 minutes
When the cycle is complete, the machine beep and the display shows «Done». You can now remove the bowl from the base.
Step 4: Serve or distribute
For a scoopable ice, Remove the lid from the bowl, take out the jar and serve directly with a spoon. The texture is already perfect, creamy and ready to enjoy.
For soft serve, it's a little different. Once the cycle is complete, remove the bowl from the base, but leave the pot inside. Install the distribution cover on the pot (it clips onto the top). Replace the assembly (bowl + pot + dispensing lid) on the left-hand side of the base, where the handle is located.
Insert the distribution handle in its housing. Place your cone or bowl under the nozzle. Pull the handle towards you: position 1 for slow flow, position 2 for medium flow, position 3 for fast flow. Ice comes out in a glacier-like spiral.
If your soft serve doesn't flow easily, it may be too cold. Leave for 2-3 minutes at room temperature and try again.
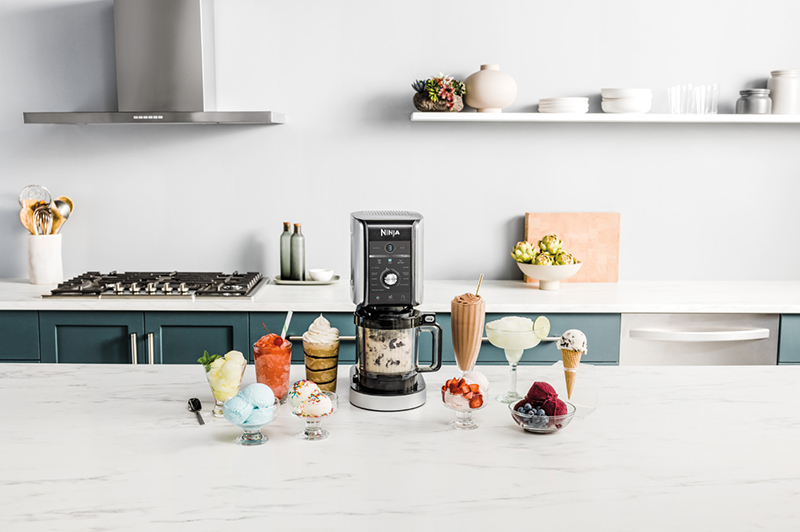
The 13 programs: when to use which one
Ninja Swirl offers 13 different programs. It was confusing for me at first. Now I know exactly which one to choose for my recipe.
Ice Cream: the versatile program
This is my most popular program (approx. 60% of the time). Suitable for all classic high-fat ice creams: bases with cream, whole milk, egg yolks. Dense, creamy texture, like scoopable artisan ice cream.
Use Ice Cream for: classic vanilla ice cream, chocolate, coffee, pistachio, cookie dough, all your traditional recipes.
Lite Ice Cream: for lighter versions
This program is specially designed for recipes low-sugar or with sweeteners. He mixes slightly differently to compensate for the lack of sugar, which normally affects the texture.
Use Lite Ice Cream for: recipes with stevia, erythritol, allulose, or reduced-calorie recipes.
Sorbet: for fruity, dairy-free bases
Program dedicated to sorbets and dairy-free preparations. Blending adapted to more liquid and less fatty bases. Smooth, refreshing texture.
Use Sorbet for: fruit sorbets (strawberry, lemon, mango), granités, vegetable ice creams made with fruit juices.
Gelato: dense Italian texture
The Gelato program creates a more dense and less airy than Ice Cream. This is the true texture of Italian gelato, richer and creamier.
Use Gelato for: authentic Italian recipes, Italian-style mascarpone, hazelnut and pistachio ice creams, very rich bases.
Frozen yogurt: scoopable frozen yogurt
Program optimized to transform yogurt (Greek, plain or flavoured) in frozen yogurt. Slightly tangy, creamy texture.
Use Frozen Yogurt for: frozen Greek yogurt, fruit frozen yogurt, classic yogurt bases.
Milkshake: thick liquid texture
This program creates a texture more liquid than the others, perfect for a thick milkshake with a spoon. Less mixing than Ice Cream.
Use Milkshake to: turn hard ice cream into a milkshake, create thick frozen smoothies, very liquid bases.
Soft Serve: the star of soft serve
Visit flagship program of the Swirl. Creates a light, airy texture that's flexible enough to be dispensed in a spiral. Spins at specific speeds to incorporate more air.
Use Soft Serve for: classic Italian ice (vanilla, chocolate), rich bases intended to be served in cones.
Fruit Whip: soft serve fruity
Soft serve version optimized for fruity bases. Light, frothy texture, like an airy, dispensable sorbet.
Use Fruit Whip for: fresh or frozen fruit bases, soft serve sorbets, dispensable dairy-free preparations.
Frozen Custard: soft serve riche
Program that creates a soft serve extra-creamy and dense, Perfect for very rich recipes with egg yolks. Texture between gelato and soft serve.
Use Frozen Custard for: frozen custards, egg bases, traditional custard recipes.
Swirled Lite Ice Cream: lightened soft serve
Soft serve optimized for low-fat recipes with sweeteners or low-calorie. Compensates for lack of sugar and fat.
Use Swirled Lite Ice Cream for: soft serve light, bases with sweeteners, reduced calorie dispensable versions.
Swirled Frozen Yogurt: soft serve yogurt
Dispensable version of frozen yogurt. Light, tangy texture that spirals out easily.
Use Swirled Frozen Yogurt for: frozen yogurt in cones, frozen yogurt in American ice-cream parlors.
CreamiFit: protein ice cream
Visit revolutionary program for athletes. Specially designed for protein shakes and low-fat bases. Spins faster to incorporate maximum air and create a light texture despite the lack of fat.
Use CreamiFit for: frozen protein shakes, nice cream banana protein, all high-protein low-fat recipes.
Mix-in: add tracks
It's not so much an initial mixing program as a additional function. After making your ice cream with another program, you can add pieces (cookies, candies, fruit) and run Mix-in to incorporate them without pulverizing them.
Use Mix-in to: add cookie pieces, chocolate chips, fruit pieces, etc., to an already mixed ice cream.
The Re-spin program: your best friend
Visit Re-spin is not included in the 13 main programs, but it is an essential function. If your ice cream comes out granular, powdery or with crystals after the first mix, simply run Re-spin for a second 1-minute run.
I use Re-spin on about 30% de mes glaces, especially low-fat recipes or those with lots of fruit. It completely transforms the texture. On the other hand, don't never Re-spin + Mix-in one after the other, it over-mixes and the texture becomes bizarre.
My beginner's mistakes (and how to avoid them)
After three months, I've made every possible mistake. Here are the most common ones so you don't make them again.
Mistake n°1: Not respecting the Max Fill line
My very first mistake. I filled the jar a little over the line, thinking «oh, a few millilitres more is fine». Result: overflow during blending, ice everywhere in the bowl and in the machine. 20 minutes of cleaning for trying to save 50ml of ice.
Respect always the Max Fill line. It's not just a suggestion, it's a technical limitation.
Mistake No. 2: Mixing before 24 hours
I was impatient for my second ice cream. After 18 hours in the freezer, I said to myself «it looks hard, it should pass». Big mistake. The ice cream came out granular with chunks of ice unblended. Even with Re-spin, the texture was not good.
Wait for the 24 full hours, or even 36 hours if your freezer isn't very cold. Patience is rewarded.
Mistake #3: Using the wrong program
I used the Ice Cream for a very liquid, low-fat protein shake. The result was disappointing: an icy, crystalline texture. In fact, I should have used CreamiFit designed precisely for this type of preparation.
Take the time to choosing the right program according to your recipe. It really makes all the difference to the final texture.
Mistake 4: Forgetting to screw on the soft serve nozzle
The first time I wanted to make soft serve, I forgot to screw on the nozzle before putting the jar in the bowl. Result: impossible to dispense, of course. I had to stop everything, dismantle, screw on the nozzle (on a jar that was already partly mixed, a real pain), reassemble. In short, 10 minutes wasted.
For soft serve, screw on the front nozzle to put the pot in the bowl. It seems obvious now, but I didn't think of it at the time.
Mistake 5: Adding mix-ins too late
I wanted to make a cookies & cream ice cream. I mixed my vanilla base, ate a bowl, then wanted to add cookies to the rest and refreeze. Bad idea. Once the ice cream is mixed and has started to melt, if you refreeze it, it hardens enormously and the second mixing gives a weird texture.
Visit mix-ins should be added immediately after the first mix, when the ice cream is still in the jar and freshly blended. Not after you've eaten some of it and refrozen the rest.
Tips for success every time
After 70+ ices, here are my foolproof techniques for consistently perfect results.
Measure your ingredients
I soon realized that «by eye» recipes gave results highly uncertain. Now, I always weigh my ingredients with a kitchen scale. The difference between 60g and 80g of sugar completely changes the final texture.
Invest in a precise kitchen scales (15€). This is what has most improved the consistency of my ice creams.
Taste your base before freezing
Before putting your preparation in the freezer, taste it. The taste will be slightly muted once frozen, so your base should be a little too sweet or too fragrant at room temperature.
If your liquid base is bland, your ice cream will be insipid. If it tastes too sweet, it will be perfect once iced.
Use quality ingredients
The Ninja Swirl doesn't work miracles. If you put low-cost milk and cheap cocoa powder, your ice cream will taste average. With the right ingredients (full cream at 35% MG, real vanilla extract, chocolate at 70% cocoa), the difference is spectacular.
I don't buy only top-of-the-range products, but I don't skimp on the main ingredients.
Take the jars out 2-3 minutes before blending
If your freezer is very cold (-25°C or less), the jars may be damaged. too hard for efficient blending. I take them out 2-3 minutes at room temperature before starting the blending process. This makes it easier for the paddle to work.
However, don't leave them out for more than 5 minutes, otherwise the edges will start to melt and create uneven textures.
Clean immediately after use
This isn't really a tip for the ice cream itself, but for your peace of mind. Rinse all elements with lukewarm water within one minute of use. Dried ice is hell to clean, so rinse immediately in 30 seconds.
Prepare several pots in advance
Instead of preparing a jar when you want ice cream (and waiting 24 hours), prepare 4-5 different pots at the weekend. That way, you always have a choice in the freezer and can make ice cream whenever you feel like it.
My routine: Sunday afternoon, I prepare vanilla, chocolate, coffee, a fruity sorbet and a protein ice cream. The whole week is covered.
Frequently asked questions from beginners
These questions are often asked by new Ninja Swirl users.
How long can you keep mixed ice cream? Once blended, your ice cream keeps 2-3 weeks in the freezer no problem. However, it will harden over time. Use the Re-spin function to restore its creamy texture before serving.
Can you make several ice creams in a row? Yes, no problem. The machine doesn't need to rest between two cycles. You can make 4-5 jars in a row without worry. On the other hand, clean the bowl and paddle between each flavor to avoid mixing tastes.
Why does my ice cream come out grainy? Three main reasons: not frozen enough (wait 24h), unbalanced recipe (too much water, not enough fat/sugar), or wrong program chosen. Solution: Re-spin first, and if that's not enough, adjust your recipe for next time.
Can the current cycle be interrupted? Yes, you can press Stop at any time. But I don't recommend it, always let the full cycle finish for optimum texture.
What temperature should the freezer be? Ideally -18°C or less. If your freezer is warmer, increase the freezing time to 36-48h.
Can all programs do soft serve? No, only the 6 «Swirled» programs» Soft Serve, Fruit Whip, Frozen Custard, Swirled Lite Ice Cream, Swirled Frozen Yogurt and CreamiFit. The other programs create scoopable ice creams only.
My typical use routine
To give you an idea, here's how I use my Ninja Swirl on a daily basis.
Sunday afternoon (3:00-3:30 pm) I prepare my 5 jars of the week. Classic vanilla, chocolate, coffee, mango sorbet, and a protein shake. I fill each jar to Max Fill, screw on the storage lids and head for the freezer.
Monday evenings after sport (8:00 pm) I take out the jar of protein shake, frozen for 28 hours. I screw on the nozzle, place in the bowl, program CreamiFit and mix for 3 minutes. Soft serve protein distributed directly into a bowl. Immediate rinsing of all components. Total: 8 minutes from craving to tasting.
Wednesday lunchtime dessert (12h45) I take out the mango sorbet jar. No need for a nozzle for a scoopable sorbet. In the bowl, program Sorbet, 2 minutes. Serve two bowls for my wife and me. Rinse. Total: 5 minutes.
Saturday evening guests (9:00 pm) I take out the vanilla and chocolate pots to make soft serve for everyone. I mix the vanilla pot in Soft Serve, distribute 3 cones, then mix the chocolate in the same way, 3 more cones. The guests are amazed. Total: 15 minutes for 6 people served.
It's this ease of use that makes Swirl addictive. Once your jars are ready in the freezer, making an ice cream takes literally 5 minutes.
The last word
The Ninja Swirl may seem intimidating at first with its multiple programs and parts. But once you understand the logic (prepare, freeze, blend, serve), it's really child's play.
My advice for beginners: start with simple recipes of the supplied booklet. Make a classic vanilla with the Ice Cream program. Then test a basic soft serve. Once you've mastered these two basics, you can move on to more complex creations.
Don't be discouraged if your first ice creams aren't perfect. I messed up my first 3-4 before I really got the hang of it. But now I make ice creams that are as good as (or better than) anything you'll find in an ice cream parlour, and my guests never come back.
The Swirl is a investment (350€), but it's also a machine that will serve you for years if you look after it properly. And frankly, the pleasure of making real homemade soft serve is priceless.
So go ahead, test, adjust and, above all, enjoy!
Leave a comment 💬