When I received my Ninja Swirl, my first thought after the initial excitement was «but how am I going to clean this thing?». Between the pots with integrated nozzles, the dispensing system, the blade with its sharp blades, and the ice residue stuck everywhere, it looked like a maintenance nightmare.
Three months later, after cleaning the machine at least 60 times, I can tell you that it's actually a lot simpler than it sounds. Provided you know the right techniques and avoid some of the mistakes I made at the beginning.
Things to remember : Most of the Ninja Swirl's parts are dishwasher-safe, making maintenance a breeze. The secret is to rinse immediately after use and never let ice dry on the parts. Cleaning takes 5 minutes if you do it right away.
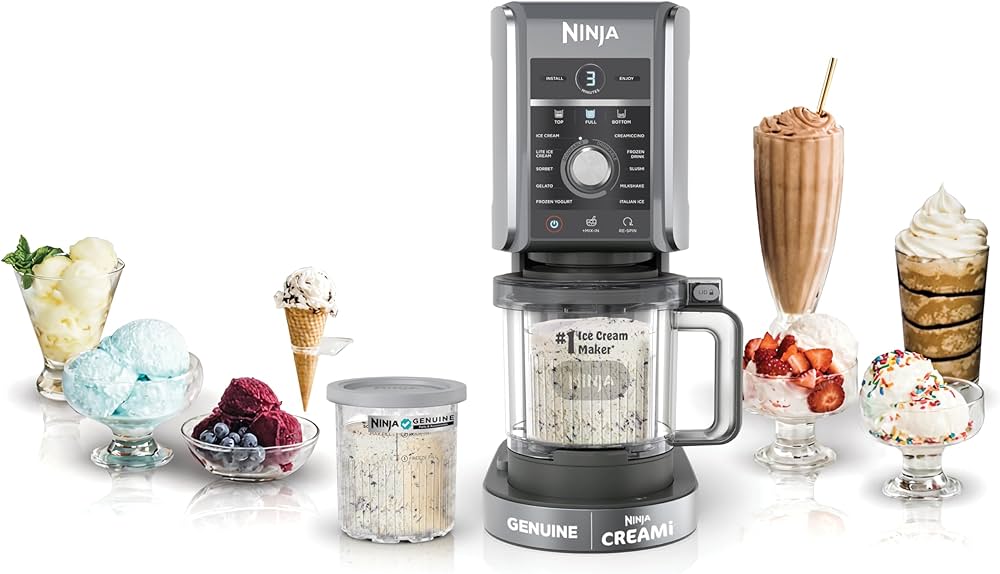
Ninja Swirl parts: what can be washed and how
Before talking about cleaning, it's important to understand what this machine is made of. The Ninja Swirl has more parts than the classic Creami because of the soft serve dispensing system.
Dishwasher-safe parts
Good news: almost everything is dishwasher-safe, And it's a real lifesaver. Here's the complete list of items you can put in the dishwasher without worry:
Visit Swirl jars with their storage lids can go straight into the dishwasher. I always put them in the upper basket to prevent them from warping under the heat from below. The screw-on nozzles that attach to the base of the pots are also dishwasher-safe.
Visit outer bowl and its cover go through without a hitch. I generally place them in the lower basket, as they are quite large and sturdy pieces.
Visit pale Creamerizer is dishwasher-safe, but I have a specific technique for this one, which I'll explain below. This is the trickiest part to clean because of the blades.
Visit distribution cover with its press system and handle are also compatible. On the other hand, I always disassemble the handle before putting it in the dishwasher to clean all the nooks and crannies.
Visit drip tray removable, dishwasher-safe. It's a small part that quickly gets dirty with ice drips.
The only part that can't be washed: the motor base
Visit motor base with the screen and buttons never be submerged in water or put in the dishwasher. It's common sense, but I prefer to make it clear. Simply wipe clean with a damp cloth after each use.
My cleaning routine after each use
This is exactly what I do systematically after making an ice cream. This routine literally takes 5 minutes and saves 90% you a lot of cleaning trouble.
Step 1: Immediate rinse (crucial)
As soon as I've finished dispensing my soft serve or scooping my ice cream, I rinse it off. immediately all parts with lukewarm water. And I mean immediately, not «in 10 minutes» or «after eating my ice cream».
Why is this so important? Because ice that dries out becomes incredibly difficult to clean. I once made the mistake of leaving the pot with residue in it for 2 hours. As a result, I had to soak it overnight and scrub like crazy the next day. Since then, I always rinse within a minute of use.
I run all the elements under warm tap water, rubbing lightly with my fingers. No soap is needed at this stage, just water to remove the bulk of the residue. It takes 30 seconds per piece maximum.
Step 2: Complete disassembly
Once the rinsing is done, I dismantle all the elements for a thorough cleaning. Visit screw-on nozzles are unscrewed from the base of the pots. Visit distribution cover separates from the handle. Everything disassembles easily without tools.
I also separate the silicone seal of the outer bowl lid when I do a thorough cleaning. This seal sometimes accumulates invisible residues that can become moldy if not cleaned regularly.
Step 3: Head for the dishwasher or hand wash
Most of the time, after rinsing immediately, I simply put everything in the dishwasher. dishwasher and leave it to me. Normal program, standard temperature, nothing special. I usually start the dishwasher in the evening when I've used the Swirl several times during the day.
When I don't have time to wait for the next dishwasher cycle (because I need the pots to prepare a new round), I wash by hand. Hot water, classic dishwashing liquid, soft sponge, and it's done in 2 minutes per piece.
Step 4: Complete drying
Whether after dishwashing or hand washing, I make sure that all parts are perfectly dry before storing or reusing. Residual moisture can create strange odors or even mildew in enclosed areas such as nozzles.
I generally leave everything to air-dry on a clean cloth for 30 minutes to 1 hour. For pots and lids, I turn them upside down so that the water doesn't stagnate inside.
Cleaning the Creamerizer blade: my anti-injury technique
Visit pale Creamerizer is the most delicate part to clean. It has very sharp blades that can cut you if you're not careful. I have a small scar on my index finger to prove it.
Here's how I clean it safely. After rinsing immediately with lukewarm water, I place it in the upper dishwasher basket and secure it so that it doesn't move during the cycle. If I wash it by hand, I must not touch it. never directly on the blades.
I use a long-handled dish brush to gently scrub around the blades. I hold the blade by the central axis (the part without the blade) and brush only with the brush, never with my fingers. Ice residues are easily removed if you rinse immediately.
To dry the blade, I simply place it on a cloth and let it air dry. I don't wipe it with a cloth to avoid contact with the blades. Once dry, I store it in its dedicated slot in the outer bowl.
Pitfalls to avoid
After three months of use, I've identified several classic errors that complicate cleaning or can damage the machine.
Never let ice dry out
I've said it before, but I'll say it again because it's really the number one mistake. Dried ice is hell to clean. It sticks like glue, requires prolonged soaking, and sometimes even scraping, which can scratch plastic parts.
I've seen people on forums who leave their dirty pots «for later» and then complain that cleaning them is a pain. It has to be. An immediate 30-second rinse saves you 20 minutes of hassle later.
Beware of abrasive products
Ninja Swirl parts are made of BPA-free plastic which can be easily scratched. Never use green-side scouring sponges, metal pads or abrasive products such as scouring cream.
I scratched one of my first pots using the green side of the sponge on a stubborn stain. The scratches aren't just aesthetic: they create micro-holes where bacteria can lodge. Since then, I've only used the soft side of sponge or a soft-bristle brush.
Never submerge the entire blade
Although the blade is dishwasher-safe, some people make the mistake of leaving it to soak completely in a sink full of water. The problem is that the central axis can accumulate water inside, which is then difficult to evacuate completely.
If you must soak it (which should never happen if you rinse immediately), do not submerge it completely. Keep the upper shaft out of the water.
Check seals regularly
Visit silicone seals lids can deform or deteriorate over time and with repeated washing. I check once a month that the seals are in good condition, with no tears or deformation.
If a seal is damaged, it must be replaced. replace immediately. A faulty seal may cause leaks during blending or prevent a good seal during freezing.
Cleaning the motor base: simple but important
Visit motor base is low-maintenance, but still requires regular cleaning. During blending, micro-projections of ice can appear on the top of the machine, around the bowl housing.
After each use, I take a damp cloth over the entire surface of the base. I particularly insist on the edge where the bowl fits, because this is where residues accumulate. A lightly dampened microfiber cloth is all you need.
For the’digital display, I use a soft, dry cloth. No water directly on it to avoid infiltration. If the screen is really dirty with fingerprints, a little glass cleaner on the cloth (never directly on the screen) works wonders.
Visit drip tray at the bottom of the machine is easy to remove. I always clean it after each soft serve session, because it catches all the drips. Direction dishwasher or quick rinse by hand.
Deep cleaning: once a month
In addition to daily cleaning, I do a monthly spring cleaning more thorough. It takes me about 30 minutes and keeps the machine in top condition.
Descaling pots
Even if you wash regularly, the pots can accumulate limescale over time, especially if you have hard water. Once a month, I soak the pots in a solution of diluted white vinegar (half vinegar, half water) for 30 minutes.
It dissolves limescale completely and refreshes the pots. After soaking, I rinse with plenty of clean water and use a soft brush if necessary. The pots look as good as new.
Nozzle cleaning
Visit screw-on nozzles at the base of the pots deserve special attention, as this is where the soft serve passes through. Residues can accumulate in the screwing mechanism or in the dispensing hole.
I dismantle the nozzles completely and soak them in very hot soapy water for 15 minutes. Then I use a small brush (I used an old toothbrush) to clean the inside of the distributor hole and the threads.
The outer bowl gasket
Visit silicone seal of the outer bowl lid, I dismantle it once a month for a thorough cleaning. It can accumulate micro-residues invisible to the naked eye, which can develop odors.
I wash it in very hot water with washing-up liquid, rinse it well, and let it dry completely before putting it back in place. It's a 2-minute operation that avoids unpleasant surprises.
Checking the blade
Once a month, I carefully inspect the pale Creamerizer to check for damage. I check that the blades are sharp, that there are no cracks in the plastic, and that the axle turns freely.
If I notice a fault (dull blade, crack, play in the axle), I contact Ninja after-sales service for a replacement. The blade is the heart of the machine, and must be in perfect condition.
Persistent odours: how to get rid of them
There have been a few occasions when unpleasant odors are settling in the pots, especially after making very fragrant ice creams (coffee, mint, exotic fruits). Here are my solutions.
Miracle baking soda
My unstoppable technique: I fill the jar with lukewarm water, then add 2 tablespoons baking soda, Close with the lid, shake vigorously for 30 seconds, and leave to stand for 1 hour.
Then I empty, rinse thoroughly, and the smell is completely gone. Baking soda absorbs odors without leaving a chemical residue. It's my favorite solution, natural and ultra-effective.
Lemon for stubborn cases
If bicarbonate isn't enough (it's only happened to me once with a curry ice cream, yes I've tested it), I go for the heavy artillery: the lemon. I rub the inside of the jar with half a lemon, leave for 15 minutes, then rinse.
Lemon has a powerful deodorizing effect and leaves a pleasantly fresh scent. But be sure to rinse well after use, otherwise your next ice cream will have a slightly lemony taste.
The freezer as a temporary solution
Sometimes, however, the smell persists. In this case, I simply put the pot empty in freezer for 24 hours. The intense cold neutralizes many odors. It's surprising, but it works.
Obviously, this is only a temporary solution. If the smell returns as soon as the jar is at room temperature, you'll need to switch back to bicarbonate or lemon.
Cleaning frequency: my calendar
Here's exactly how often I clean each element of my Ninja Swirl.
After each use (daily if you use the machine every day): immediate rinsing of all elements that have been in contact with the ice (pots, paddle, bowl, lids). Put in dishwasher or wash by hand. Clean motor base with a damp cloth.
Once a week Cleaning: thorough cleaning of distribution nozzles if I've used soft serve several times a week. Check that all seals are clean and in good condition. Cleaning the collection tray, even if it looks clean.
Once a month Complete cleaning and descaling of pots with white vinegar. Disassembly and cleaning of outer bowl seal. Complete inspection of the blade. Deep cleaning of all nooks and crannies with a toothbrush.
Every 3 months General check of the condition of all parts. Replace worn parts if necessary (seals, scratched pots). Complete descaling of all metal parts if limescale is visible.
This routine may seem intensive, but in reality, daily cleaning only takes a few minutes. 5 minutes if you rinse immediately. Weekly and monthly cleanings take longer, but are spaced out.
Comparison with classic Creami
I owned a Creami Deluxe before the Swirl, and frankly, the cleaning the Swirl is slightly more complicateddue to additional parts in the distribution system.
The classic Creami has fewer parts: no screw-on nozzles, no dispensing lid with handle, no collection tray. Cleaning is therefore mechanically quicker. However, the principle remains the same: immediate rinse, dishwasher or manual washing.
Visit blade is identical on both machines, so cleaning is equally delicate. The Swirl's pots are slightly more complex because of the screw-in system for the nozzle, but this only adds 30 seconds to the cleaning time per pot.
All in all, I'd say the Swirl requires 2 minutes more cleaning time than a classic Creami. It's really not significant, and shouldn't be a criterion for choosing between the two models.
Products I use and recommend
To clean my Ninja Swirl, I only use simple, inexpensive products. No need for expensive specialized products.
My washing-up liquid classic works perfectly. I use Fairy because it's the one I've always had at home, but any brand will do. The important thing is to have a product that degreases well.
For monthly descaling, the white vinegar at €1 a liter in the supermarket is perfect. There's no need to buy special vinegar for descaling at €5 a bottle, it does exactly the same thing.
Visit baking soda for odors, I buy it in 500g bags for 2€. One sachet easily lasts me 6 months.
In terms of equipment, I have a long-handled dish brush (5€ at Ikea) specially dedicated to cleaning the blade. And I've kept a few old toothbrushes for cleaning hard-to-reach corners such as nozzles.
From microfiber cloths (pack of 10 for 8€) for the motor base and screen. They don't scratch and absorb water well.
All in all, my complete Ninja Swirl cleaning kit cost less than 20€ and has been with me for months. Really nothing extravagant.
What to do about stubborn stains
Despite regular cleaning, it can happen that persistent stains are taking hold in the jars, especially with certain coloring ingredients such as red fruit, coffee and turmeric.
For light stains, a soak in hot soapy water for 30 minutes followed by gentle brushing is usually enough. I insist on water hot but not boiling: plastic doesn't like extreme temperatures.
For more stubborn stains, my miracle solution is the sodium percarbonate. I fill the pot with hot water, add a tablespoon of percarbonate, leave for 2 hours, and the stain disappears like magic. Percarbonate is a natural, oxygenated stain remover that leaves no residue.
I also tested the’diluted bleach for really stubborn stains, but I don't recommend it. Even with intensive rinsing, I felt that my subsequent ice creams tasted funny. Percarbonate is much safer.
If nothing really works and the stain is just cosmetic (no grime, just discoloration), I live with it. A slightly stained jar makes no difference to the quality of the ice cream produced.
My final word on the interview
After three months and sixty or so cleanings, I can tell you that Ninja Swirl maintenance really isn't a chore if you adopt the right habits from the outset.
The absolute secret, the one that changes everything, is the instant rinse. The 30 seconds you take to rinse each part immediately after use saves you 20 minutes of hassle later. That's the best advice I can give you.
Then take advantage of the fact that dishwasher-safe. If you've got a dishwasher at home, cleaning becomes really trivial. A quick rinse, off to the machine, and you're done.
Monthly deep-cleaning may seem onerous on paper, but in practice it's 30 minutes a month to keep your machine in top condition. Given the price of the machine, it's an investment in time that's totally justified.
Personally, I'd rather spend 5 minutes cleaning my Swirl after each use than have a dirty machine that produces ice creams with strange smells or residues. Maintenance is part of the experience, and a clean machine makes better ice cream.
So yes, there are more parts to wash than with a simple ice cream maker. But the pleasure of making real homemade soft serve more than makes up for those few extra minutes of maintenance.
Do you have any cleaning tips for your Creami or Swirl? Any miracle products I've missed? Share your techniques in comments, I'm always curious to learn new methods!


Leave a comment 💬